I decided to do a double down with ice instruction, so to speak, and after my 1:1 course with Mark Miller where we dialed in technique on the steep stuff, I followed it up with San Juan Mountain Guide’s 4-day Leader’s Seminar, which also was with Mark Miller.
A total of seven days over two weeks with the foremost ice climbing instructor in all of Ouray? It doesn’t get much better than that.
Up until this point in Ouray I had only led a couple pitches of easy WI2 ice. I’ve always been a little timid when it comes to hoping on the sharp end, what can I say?
It’s something that I wanted to work on (and which I continue to work through). I thought this course specifically focused on leading ice would be a good way to boost my competence and confidence.
Early Tuesday morning I headed down to San Juan’s shop on Main Street to meet up with Mark Miller and my fellow clients. The Leader’s Seminar with SJMG is capped at a total of 4 students, with a 2:1 ratio in that case.
There were only three of us students though, so for today at least it would just be Mark. Everybody had to take care of the necessary paperwork and get situated with their gear needs for the next four days.
With Mark’s encouragement I decided to borrow a different harness, one which had room for four ice clippers, had four gear loops, and was a little more padded than what I’d been using throughout my duration in Ouray…
The Black Diamond Couloir harness, aka the Alpine G-String, it’s a top notch harness for alpine endeavors, but certainly not the most comfortable harness if you need to sit on the rope for whatever reason.
We headed up to the Trestle area (located between the School Room and the Upper Bridge) for today’s activities. Much of today’s activities ended up being review for me based on what Mark and I had already worked on in my 1:1 course.
The chief goal of that day was to make sure everyone was using their best form possible–straight armed monkey hangs, using the “A Formation”, getting good solid placements with their feet, and then working out the rest stance sequences.
Mark also added in some further elements and additional refinements to my technique since we had so recently dialed things in. One of which was the addition of another kick to the sequence, a Swing-Kick-Kick-Kick, if you will.
Adding the additional kick was just something he thought would suit my particular style of climbing and the additional centering kick would better encourage me to swing my hips out and wide for the following kicks–getting better purchase.
Subtle Visual Cues to Proper Form
There are distinct pros and cons for both climbing one-on-one with a guide or the guided group setting, chief among the advantages with a group, in my mind, is the additional feedback provided to the other clients and their asking questions that don’t always come up in my mind.
One thing Mark and I did during the previous week during our down time, was walk around and analyze other people climbing and their technique, trying to develop my eye for good and bad form–a valuable exercise in and of itself.
Mark had all sorts of little insights to share about how he sees and recognizes good form, one of which was watching for a looseness in the fabric of the seat of a climber’s pants… With proper swinging form the hips are close to the wall, butt cheeks clenched, creating some slack in the back of the pants, if you will.
Improper form while swinging obviously sees your hips out away from the wall, which limits your swing length and is more associated with the unbalanced feel of X Formation climbing, doesn’t allow the slack in the back, so the fabric of the pants is still tight around your butt.
Subtle but easy visual cue that a belayer can easily see, and one that I had not picked up on until Mark mentioned it.
Climbing without Crampons
We went back into the fundamentals of screw placements, when and where to place, etc, and then in the afternoon we jumped into some easy mock leads.
Since there were three of us clients and just one Mark, we could have two separate climbing parties. One would mock lead with Mark belaying and providing feedback, and the other two would work on different elements on another line.
One exercise we did on the other rope was to climb without crampons, which was pretty interesting. I’ve done the one ice tool or no ice tool climbs in the past which makes you really trust your feet–it’s sort of akin to slab climbing–but I’d never climbed without crampons.
We were still climbing steep, almost vertical, ice–but as is typical with Ouray, a lot of it is fairly stepped out. It was a useful exercise and not as hard as I imagined it to be from the ground.
It really forces you to trust your feet placements and to recognize and use the features of the ice for foot placements, don’t just bash your feet in anywhere. The hardest part of the drill was actually being lowered off–that’s where you start slipping and sliding all around!
We also worked on the seldom practiced art of down-climbing during this session… You basically reverse the proper form used during the ascent, but in a totally new and unfamiliar manner.
Mark and I had worked on this skill somewhat during the previous week’s session, and it was good to get some more focused practice with it. The idea here being that if you can comfortably down climb whatever you get yourself into, then you’ll be able to more comfortably push yourself on lead, knowing you can get back down to a safe stance.
Too many new ice leaders when they start to burn out seem to succumb to the ‘when in doubt, run it out’ mantra’ and don’t place pro, just gun for the top, making the most difficult moves (cresting the bulge) when they are most fatigued (and least protected while running it out). The Fall from Glory to Grace video comes immediately to mind (https://vimeo.com/20549603).
Stepping Up the Mock Leads
Day two saw our group being joined by guide Ben Kiessel who would free up belays and be able to provide additional feedback since we were broken up into two groups.
We were to head to the School Room today to focus more thoroughly on our mock leading efforts. A storm had descended on the San Juans and it was a cold and snowy day… A theme that would persist in the days ahead.
Mark wanted us to be mock leading today a grade above whatever we hoped to be leading by the courses end.
So basically just pushing us into more vertical and strenuous terrain with the backup top rope and get a good feel for that, so that way when we dialed it back to more moderate terrain we could be like “ahh, yeah that’s not too bad”.
I’ve done the whole mock lead thing on rock before and find it to be a helpful exercise for sure.
Climbing with Half Ropes
One new element, at least for me, was the introduction of using half ropes. Half ropes differ from single and twin ropes in that you clip alternate protection points–each strand is meant to protect +/- half of the fall, twin ropes you must clip both ropes into each piece of protection.
The half ropes are meant to be placed at staggering levels of protection so that in the event of a fall one rope would begin to catch the force and say, absorb 60%, continue stretching until the other piece engages and catch the remaining 40%.
Ideally, this reduces the amount of force exerted on any given piece. There are other advantages and disadvantages to the half rope setup which I won’t go into here (reminds of a recurring climbing forum conversation, HALFs, DOUBLEs, TWINs!), but you can read more here, if you like: http://www.chockstone.org/TechTips/TwoRopes.htm
Namely, I just found it a little challenging during the first few mock leads to keep the ropes straight and running tangle free. Depending on how you grab and clip the ropes you can create unnecessary twists between points of protection which will create unwanted rope drag.
Half ropes are a more complicated setup, at least in the beginning, but it’s a good to become familiar with their use as well as their advantages and disadvantages.
It was good to get some practice placing screws on the steep stuff, to feel the burn in your arms and to work on getting the screw to start, shaking out, switching arms, and continuing to drive the screw in.
Just to know that “okay, I can work through the pump and burn”. Me and the other guy were climbing just down the canyon a little bit, running through more mock leads when I look back and see Mark just halfway up the School Room, climbing beside the other client…
No rope, just free soloing it.
He was able to get up close and personal to provide immediate feedback as to where she should place screws and how she was placing them. He was definitely garnering some looks, as people would mutter to their partners “is that guy just climbing without a rope?”
Multipitch Climbing in the Park
On the third morning we ended up waiting around for a bit for one of the clients, but she turned out to be sick that morning and wouldn’t be joining.
Must be a real bummer to pay so much for a course like this and have to forego half of the experience (she missed both the third and fourth days).
So with only two clients we also didn’t have Ben join us that morning–just the three of us headed up to the Scottish Gullies where we could we work on aspects of multipitch ice climbing.
The snow was absolutely dumping and had been at least a day or two. We rappelled into one of the gullies and all three of us took turns trying to brush off as much of the snow as we could, since we were doing low angle ice the snow really piled up!
We would be breaking this short route up into two pitches so we could talk about building anchors, where to position the belay, identifying the line, and dealing with transitions.
Obviously you want to think about where the route is going to go and create the belay station out of the line of fire from falling ice–and whoever is leading the subsequent pitch needs to climb (in a manner or location) so they aren’t walloping their belayer. See Will Gadd’s post Ice Breaks: Don’t be in the way of it as it falls!
After topping out we did a quick little clinic on creating better efficiency while setting up anchors particularly dealing with the “fumble factor” of doing everything in gloves.
Mark has all sorts of little tips and tricks for everything he does, like how to position your hand to quickly and easily tie the overhand knot for your master point, and things of that nature.
Multipitching the Upper Bridge
In the afternoon we over to the Upper Bridge area to mock lead and mock multipitch one of the bigger routes that are available there. We got on Whitt’s World or at least a variation of it… The book says it’s a WI4, but we took a predominately WI3 route.
We lowered down into the bottom of the canyon and Mark lowered in part of the way–he couldn’t reach the bottom since he was counterbalanced on our mock lead top rope setup, and the routes there are too long for a sling shot top rope.
Rowan took the first mock lead and had a little trouble on the nearly vertical section. I was trying to stay warm down at the base. Stamping my feet and swinging my arms. I still had him on belay since our top rope setup would’ve provided a pretty big pendulum.
The snow was still dumping and big sloughs would occasionally fly down onto us. Fun! By the time I started climbing my hands were pretty well frozen and only getting worse as I climbed the pitch.
Ugh.
We switched rope ends so I had the top rope backup and then I took off–hands a little warmer now.
The plumb line was right of Rowan coming off the belay station, but I had to traverse leftward to ensure I wouldn’t hit him. An incapacitated belayer is no belayer at all. The route went pretty smoothly I felt, though I still wasn’t sure if I’d want to actually be leading it.
Self Rescue Refresher
The whole multipitch process up Whitt’s World took up the majority of the afternoon.
We continued to hang around at the top of the Upper Bridge area and switched gears to focus on self rescue techniques, raising and lowering a second, and things of that nature. Mark is a big fan of the Purcell Prussik. I’m familiar with the Purcell, but have never used one myself.
He demonstrated how it can save a number of steps in the self rescue process when you don’t need to do the munter hitch and then lock it off. He also contended that the mule knot in the munter-mule-overhand (MMO) combo was not necessary and should be replaced with the easier to do half-hitch.
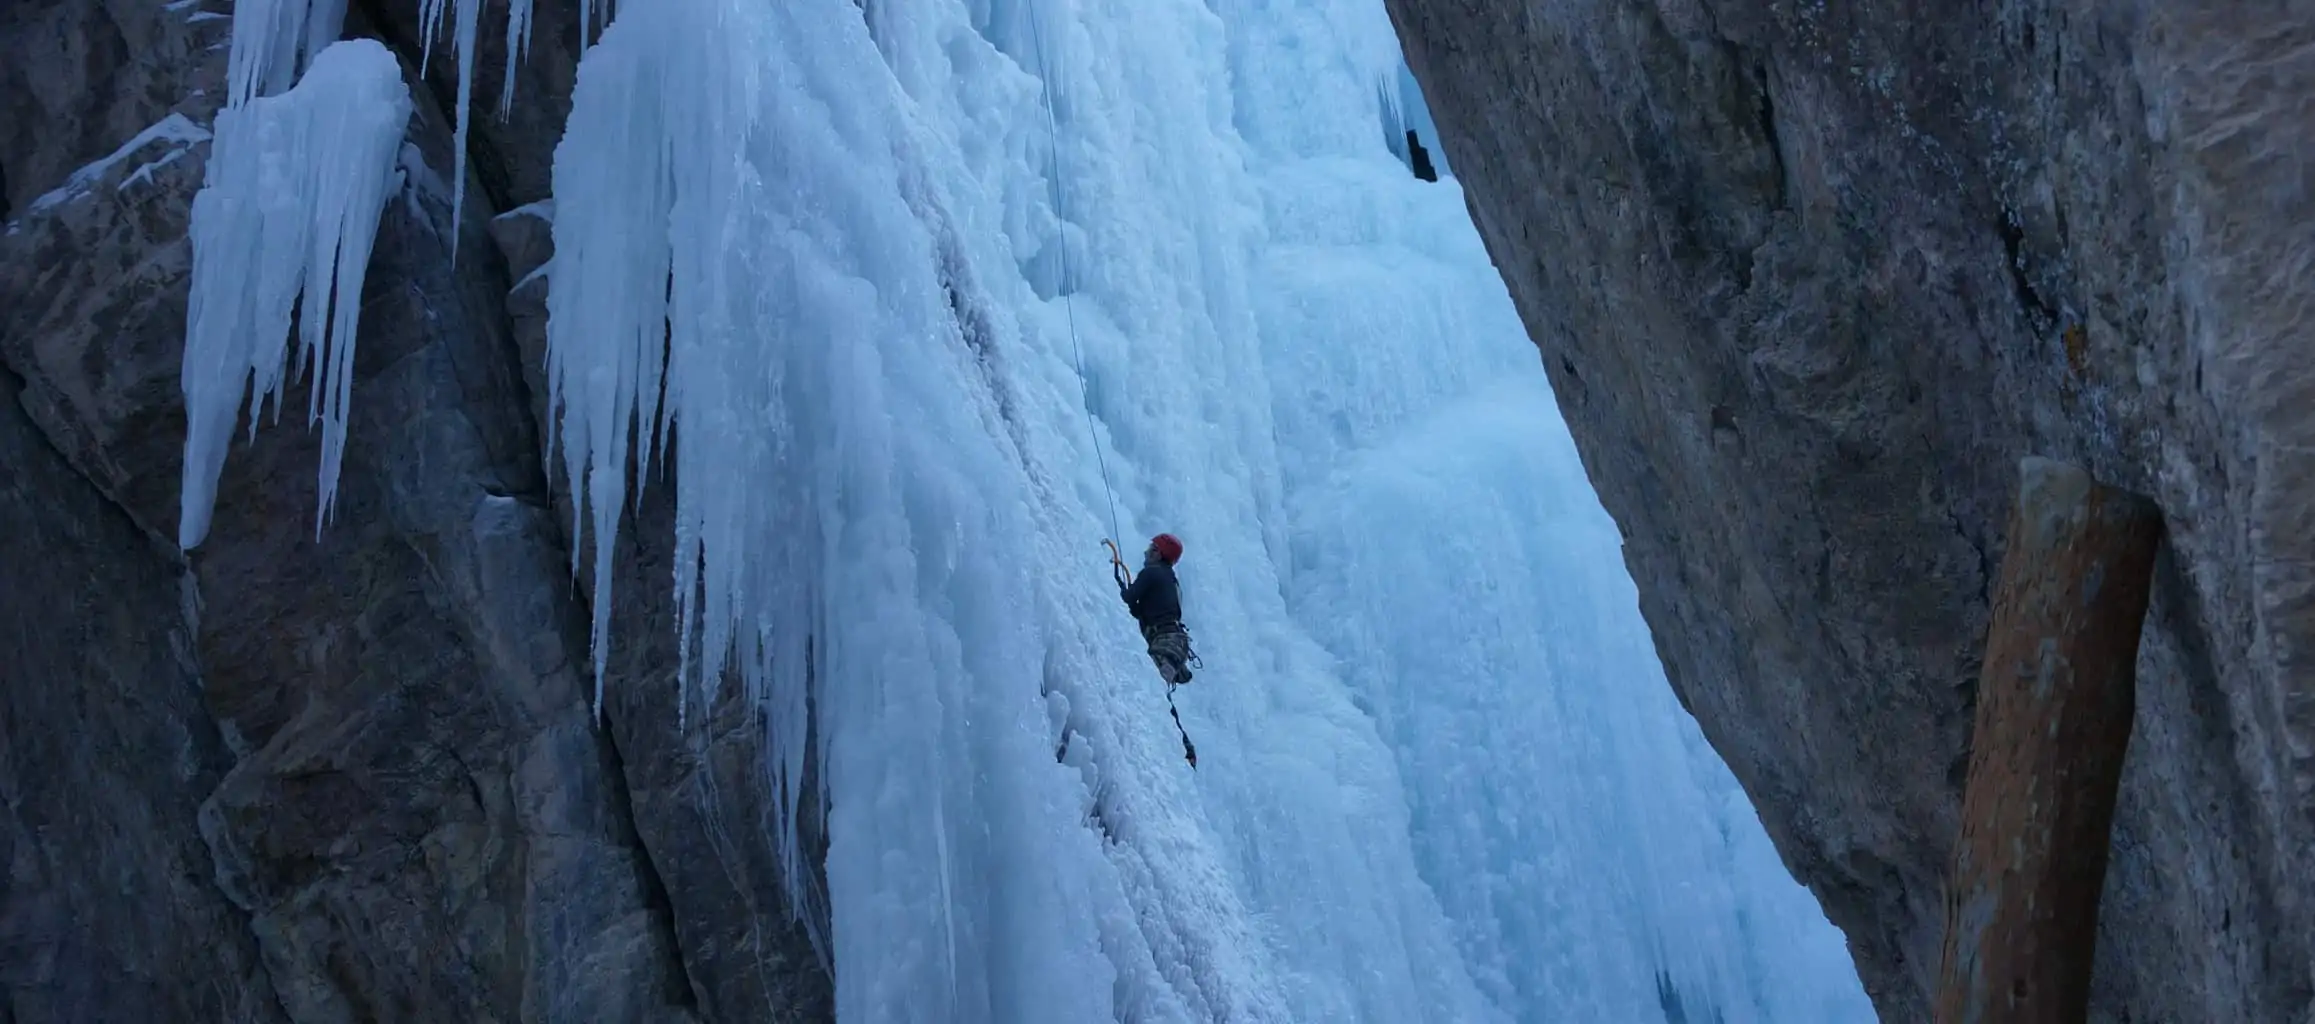
Getting on the Sharp End
On our fourth and final day we headed straight to South Park–the climbing location farthest upstream.
When we arrived in the parking lot there was a HUGE group of like 40 college kids on a guided trip that were also heading to South Park so we got out of there as fast as possible to snag some routes before they did.
We headed to some easy WI2s to start out on and both Rowan and I ran a few laps on each of the routes while Mark soloed right nearby and provided feedback.
Again, the snow was dumping today and just as fast as we’d clean a route, it’d be covered by snow again. They all felt pretty cruiser, and I felt quite confident on them (thankfully! I’ve been climbing ice here for how long by this point!).
Later we headed downstream in South Park a little bit and hopped on some WI3 routes. This time it felt a little more ‘real’ to me… I took the first run at a route that we hadn’t cleaned, since it would make it a more realistic and valuable experience for me.
It was a little stressful to be honest.
I think the added element of the deep snow in places was particularly unnerving. That, combined with the typically beat out and mangled park ice… Where you have giant holes and weird hollow things and who knows what when you can’t really see what you are swinging or kicking into.
The top out was a serious bulge too… One of those 90 degree bad boys, not gentle at all. Bulges and top outs like that are where the majority of ice climbing falls apparently occur.
There is a technique to cresting bulges, and no it’s not the beached whale approach to flailing yourself up and over. Primarily you want to slowly work your feet up, and not overextend your swings–if you can’t see where you’re kicking, that’s not good.
Keep your heels down and don’t let your swings or your reach shift your crampons out of the ice. In the end, I made it up, all was well.
We rotated out and then ended up doing a lap on top rope at the end to just get in a little more climbing. It was cold! I was definitely fighting off the screaming barfies with all I had on that last lap.
Frozen gloves. Snow everywhere. It wasn’t the most pleasant of conditions throughout the week.
Ideally our fourth day would have concluded with us doing a backcountry route, something like Horsetail Falls, but with all the snow we’d gotten this week, it wasn’t really a good option.
But despite the weather we made the most of our time with Mark. With the exception of our last day (Friday), at times it seemed like we were the only ones in the park. We had our pick of locations and lines, if we could slog through the snow to get there.
Mark Miller is an amazing instructor and I can whole-heartedly recommend that any ice climber looking to improve should spend some time with him.
The San Juan Mountain Guide’s ice leader’s seminar is exactly what it purports to be. It takes you through the fundamentals of leading ice, from proper technique and form, to ice screw placements, to multipitch climbing, and so forth.
And they actually let you lead, which is unusual among guide services (I believe). You have to fill out a little extra paperwork, but they will actually let you hop on the sharp end.
And with Mark Miller, he’ll be soloing right beside you, providing feedback and assurance and able to quickly pop in a screw or help you out if you need it.
That is certainly one of the more unusual benefits of taking this course. Where else are you going to get that?
So yes, simply put, if you have been thinking about taking a course to focus on leading ice, you cannot go wrong with SJMG’s ice leader’s seminar.
They offer their leader’s seminar on a few fixed dates throughout the ice climbing season, be sure to check their site or contact them to find out about scheduling and availability.
Course: Ice Leader’s Seminar
Guide(s) Mark Miller and Ben Kiessel with San Juan Mountain Guides
Dates: February 19-21, 2013
Disclosure: I sought out and received a discount (10%) from SJMG for signing up for both the Ice Leader’s Course and the Private Guided Days and for offering to write up a trip report on my blog. I have no reason to believe that Mark Miller was aware of the discount, nor that it would have affected his curriculum or delivery. I was just looking to save some money.
Ryan
Latest posts by Ryan (see all)
- Kazakhstan Food: Exploring Some of its Most Delicious Dishes - August 7, 2023
- A Self-Guided Tour of Kennedy Space Center: 1-Day Itinerary - August 2, 2022
- Fairfield by Marriott Medellin Sabaneta: Affordable and Upscale - July 25, 2022
- One of the Coolest Places to Stay in Clarksdale MS: Travelers Hotel - June 14, 2022
- Space 220 Restaurant: Out-of-This-World Dining at Disney’s EPCOT - May 31, 2022
Comments 2
Wow. I’ve heard awesome things about Mark Miller. Very cool to have such a knowledgeable mentor! I absolutely adore SJMG after taking my little man to their kids clinic (the day before we met). They were absolutely amazing. I would recommend them to anyone.
Author
Thanks for the comment, Haley. Can’t agree more! Mark is awesome, I’m so glad I was able to climb with him. But you’re right, SJMG as a whole is great. From my time in town I also knew (on a social level) a number of their guides, lots of really great people.