It’s time for another quick and dirty DIY Dirtbag Project! This one is for making a simple, lightweight, insulated bowl for use in the great outdoors.
There are plenty of dirt cheap camp bowls, fancy origami folding bowls, squishy bowls, and pricey bowls made of high end metals.
This project is just for something cheap and readily available from any big box store–which is also, most importantly, highly functional!
I picked up a two pack of 28 oz Glad Lockware Food Storage Containers. I compared various sizes and shapes and found this to be the best due to its more cylindrical shape rather than conical, and 28 oz offers sufficient room for a dinner sized meal. They can be had for just a couple dollars from Wal-Mart, Target, etc.
Make one for yourself and make one for a friend or climbing partner! Or just use the extra one for leftovers in your house.
These bowls are made from #5 plastic which means they are food safe, reusable, and are safe for the microwave, dishwasher, and freezer.
Then I picked up one of those cheap-o auto sunshades that are made from what is essentially bubblewrap with the shiny metal reflective surface (kinda like this one), which you can buy brand new for not too much. But I just went to a second hand, Salvation Army store and picked one up for 99 cents.
Benefits of this bowl: has a nice screw on lid to keep contents from spilling out and with the added DIY bowl coozy, it will keep your meal hotter for longer. Helping to reduce the crunchy bits you might sometimes encounter or just help you enjoy a warmer meal while sitting out beside a frosty mountain pass. With pastas and similar items you can also reduce the amount of time cooking over your stuff since it keeps items hotter for longer. A similar idea as with cooking inside a Thermos, as I’ve talked about before, though obviously not quite as effective.
Super Scientific Testing
The same 28oz Glad bowl was filled with boiling hot water and had the lid screwed on to retain heat. One test was done with the coozy and the other test was done without the coozy (both times allowing the bowl to return to room temperature. I then took the temperature (removing the lid) of the water at specified intervals. My super-scientific tests carried out in my fancy kitchen laboratory in Medellin have yielded the following results:
Ambient Room Temperature Test
The temperature that day in Medellin was 82 degrees.
Without the coozy the water started at 189 degrees F. After 10 minutes it was down to 171 degrees, and after an additional 10 minutes was down to 158 degrees. A loss of 18 and 13 respectively for 31 degrees total over 20 minutes.
With the high tech coozy the water started at 190 degrees F. After 10 minutes it was down to 175 degrees, and after an additional 10 minutes was down to 166 degrees. A loss of 15 and 9 respectively for 24 degrees total over twenty minutes.
So only a 7 degree improvement over the no coozy option, but this test was done in a relatively hot (82 degree) ambient temperature.
Freezer Temperature
I then repeated the same style of test, filling the bowl with boiling water, but then placing it in the freezer both with the coozy and without and then taking the temperature (just once) at the fifteen minute mark. I felt this would more accurately represent the conditions faced when cooking up your pasta in a cold alpine cirque.
The ambient temperature of my freezer was measured to be 30 degrees.
Without the coozy the water started at 190 degrees. After 15 minutes it was down to 158 degrees, a loss of 32 degrees.
With the coozy the water started at 190 degrees. After 15 minutes it was down to 171 degrees, a loss of 19 degrees.
A marked improvement and difference between the two.
How to Make a DIY Dirtbag Insulated Bowl
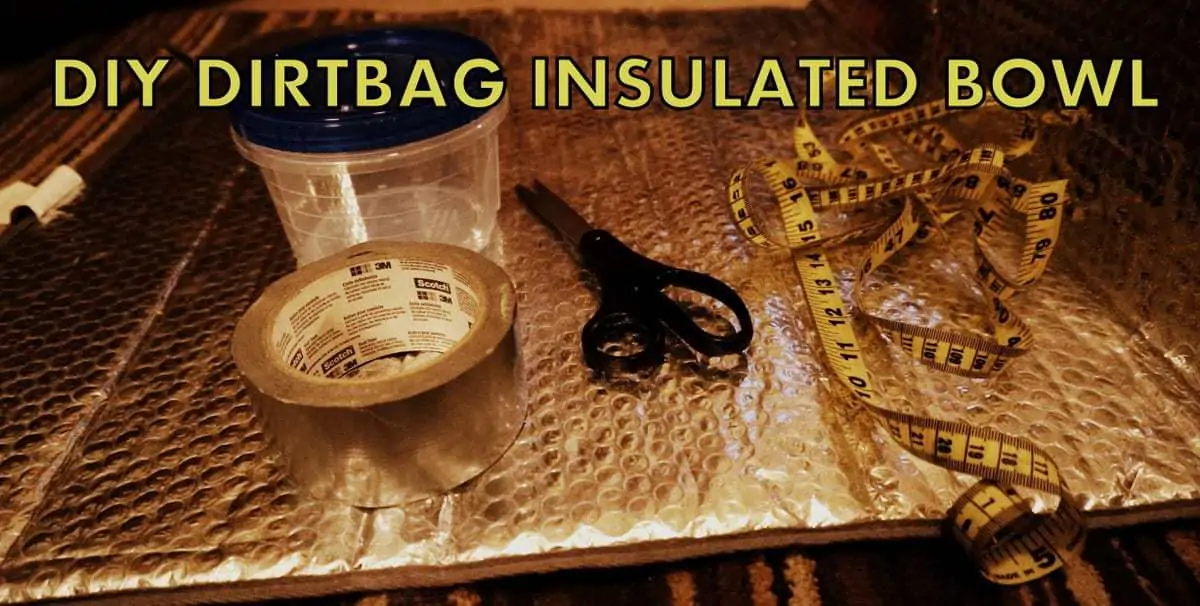
Pick up a plastic reusable bowl of the desired size and shape. I found 28oz to be right, and try and get something with near 90 degree angles–not a conical shaped bowl. The 28oz Glad Lockware Food Storage Containers were what I liked best.
You will need the cheap-o auto sunshade as mentioned above.
Along with that you will need duct tape, scissors, and a measuring tape will make it easier.

Measure the diameter and depth of the bowl and cut a piece of insulating material to measure. I found using the “hemmed” edge of the reflector to be best for my outside edges. Thus not requiring any additional tape.

With your marker, trace the bottom of the bowl on the reflective material and cut it out.
Put the bowl inside the reflective material. Wrap the bottom of edge of the reflective material with duct tape, leaving half the duct tape sticking above.

Place the bottom reflective disk on top. It works best if the bottom disk is sized to fit inside the reflective wall, and not the other way around.

Take your scissors and cut similar sized flaps all across the elevated duct tape. Then fold alternating flaps down.

This will ensure you get a nice seal and don’t have large folds of tape sticking out.

Repeat the above process for the upper lid, allowing for a slight overlap in reflective material between the lid and bowl.


There you have it! Your very own insulated bowl.


The process can obviously be replicated for other camp items, including your mug or even your cooking pot.
One nice thing is that I can fit most of my alcohol stove cook kit inside of my bowl, which also nestles nicely inside of my REI TiWare 1.3L pot.
Try it out, let me know what you think!
And don’t forget to Like, Tweet, Pinterest, or otherwise share this post. Cheers!
Ryan
Latest posts by Ryan (see all)
- Kazakhstan Food: Exploring Some of its Most Delicious Dishes - August 7, 2023
- A Self-Guided Tour of Kennedy Space Center: 1-Day Itinerary - August 2, 2022
- Fairfield by Marriott Medellin Sabaneta: Affordable and Upscale - July 25, 2022
- One of the Coolest Places to Stay in Clarksdale MS: Travelers Hotel - June 14, 2022
- Space 220 Restaurant: Out-of-This-World Dining at Disney’s EPCOT - May 31, 2022